Web Authentication is normally used by customers who want to install a guest-access  network. In a guest-access network, there is initial user name and password authentication, but security is not required for the subsequent traffic. Typical deployments can include "hot spot" locations such as Starbucks or campus atmosphere where the only concern is the connectivity.
Web authentication provides simple authentication without a supplicant or client. Also, it doesn’t provide any data encryption. Cisco WLC 526 is simple built-in Web authentication function that can be enable just like that.
Below instruction will provide how to setup web authentication page for Cisco unified system with Cisco WLC 526 and Cisco Wireless Express Access Point 521.
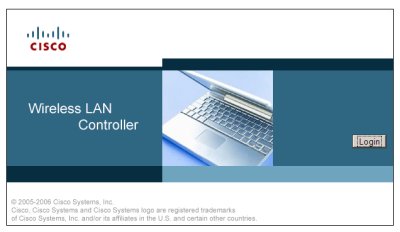
Step 1 Login your Cisco Wireless Express Controller 526.
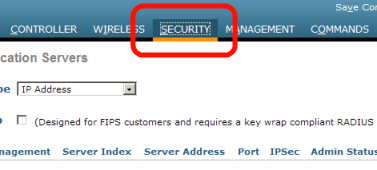
Step 2 ![]() Choose "Security" from the top menu.
Choose "Security" from the top menu.
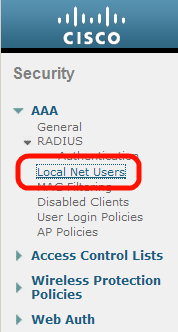
Step 3 ![]() And click "Local Net Users" from the left sidebar menu
And click "Local Net Users" from the left sidebar menu
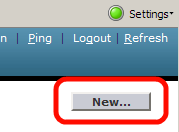
Step 4 ![]() Click "New" on top right in order to create guest user account.
Click "New" on top right in order to create guest user account.
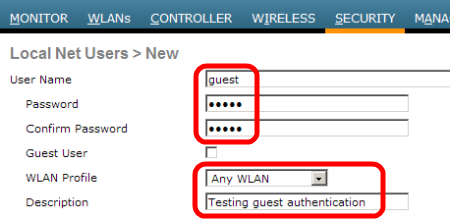
Step 5 ![]() Type Usename/login and password, also specify WLAN profile if you like. Default WLAN Profile would be "Any WLAN". And click "Apply" at top right.
Type Usename/login and password, also specify WLAN profile if you like. Default WLAN Profile would be "Any WLAN". And click "Apply" at top right.
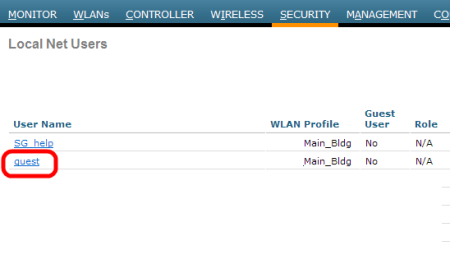
Step 6 ![]() Now, you can see "guess" account that just created.
Now, you can see "guess" account that just created.
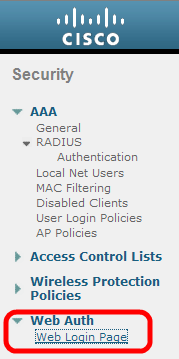
Step 7 ![]() Under same Security tab, choose "Web Auth" from the left sidebar menu.
Under same Security tab, choose "Web Auth" from the left sidebar menu.
Step 8
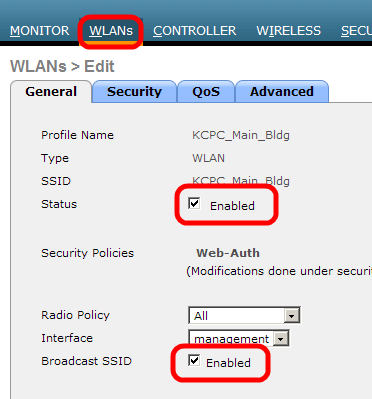
Step 9 ![]() Choose "WLANs" tab, and check those Enable box
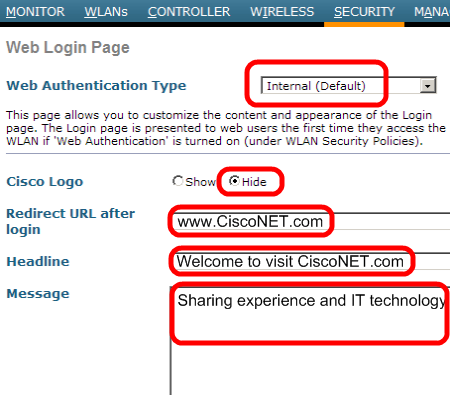
Choose "WLANs" tab, and check those Enable box ![]() Fill out all necessary fileds.
Fill out all necessary fileds.
– Web Authentication Type : Internal (Default)
– Cisco Logo : Hide
– Redirect URL after login : the user is redirected after a successful authentication. In this example, the user would be directed to www.ipBalance.com.
– Headline & Message : It will show on your first authentication page.
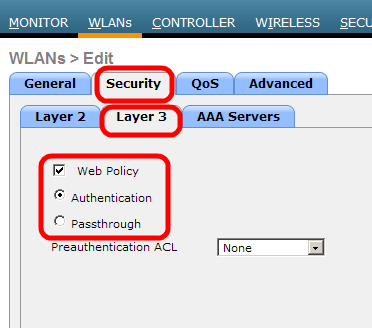
Step 10 ![]() On the Security>Layer 3 tap, check "Web Policy" and "Authentication"
On the Security>Layer 3 tap, check "Web Policy" and "Authentication"
Configuring Web Authentication page on Cisco WLC 526 is easy now.
We hope this is informative for you and we would like to thank for viewing.