The Loopback adapter is a testing tool for a virtual network environment where network access is not available. Also, you must use the Loopback adapter if there are conflicts with a network adapter or with a network adapter driver. You can bind network clients, protocols, and other network configuration items to the Loopback adapter, and you can install the network adapter driver or network adapter later while retaining the network configuration information.
Follow the blew steps;
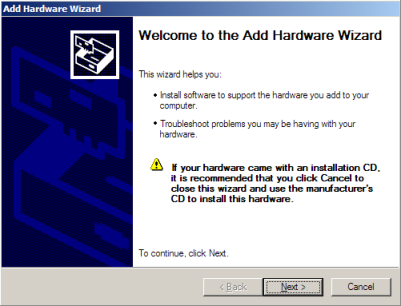
To manually install the Microsoft Loopback adapter in Windows XP, follow these steps:
1. Click Start, and then click Control Panel.
2. If you are in Classic view, click Switch to Category View under Control Panel in the left pane.
3. click Add Hardware,and then click Next.
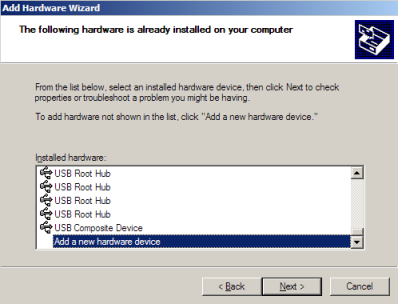
4. Click Yes, I have already connected the hardware, and then click Next.

5. At the bottom of the list, click Add a new hardware device, and then click Next.
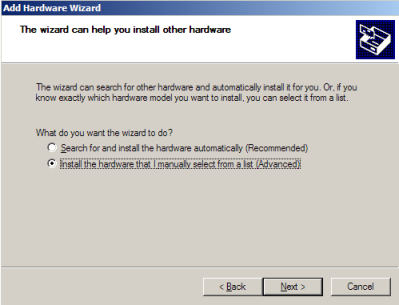
6. Click Install the hardware that I manually select from a list, and then click Next.
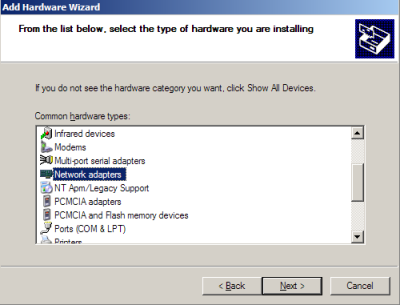
7. Click Network adapters, and then click Next.
8. In the Manufacturer box, click Microsoft.
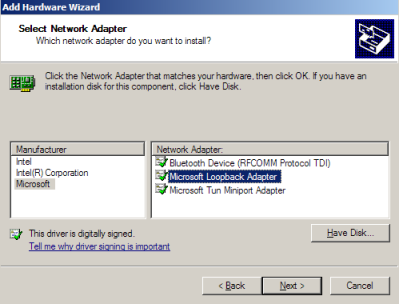
9. In the Network Adapter box, click Microsoft Loopback Adapter, and then click Next.
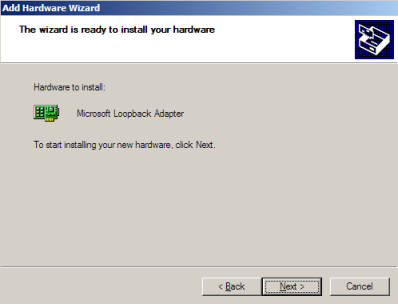
10. Click Finish.
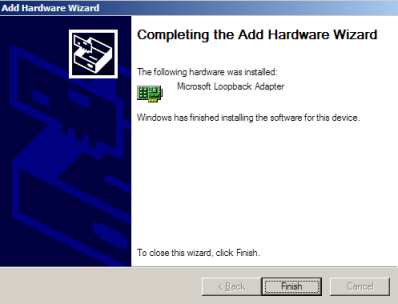
** You might need to reboot your computer to make new Loopback adapter working properly.
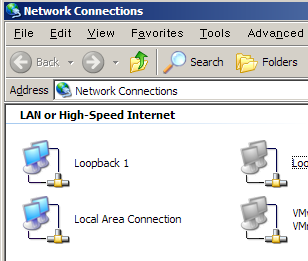
11. New Loopback Adapter is created on Network Connections section.
12. Go to Local Loopback Adapter properties and assign IP address
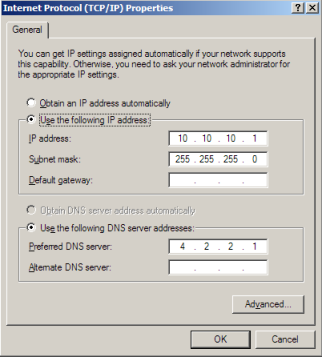
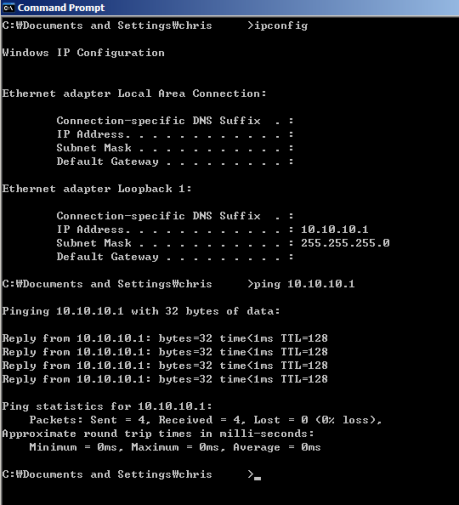
13. Ping 10.10.10.1 loopback IP address from your PC DOS prompt
If the TCP/IP properties are configured to use DHCP, the adapter will eventually use an autonet address (169.254.x.x/16) because the adapter is not actually connected to any physical media.
Note By default, TCP/IP properties are configured to use DHCP.
If you looking for Dynamips with using Terminal Server, see an article "Using Terminal Server on Dynamips" at App > Network App > Dynamips section.