Great Cisco Simulator – Dynamips! There are many Dynamips installation tips on Internet, but this would be a easiest way to install Dynamips.
This installation tips for window PC only.
1. Download below s/w
– Dynamips latest version from http://www.ipflow.utc.fr/index.php/Cisco_7200_Simulator
– Dynagen from http://www.dynagen.org/
– Libpcap from http://www.winpcap.org/install/default.htm
** If you download Dynagen / "dynagen-0.10.1_dynamips-0.8.0-RC1_Win_XP_setup". It comes with latest Dynamips s/w.
2. Install all three s/w
– Libpcap first
– Dynagen, it will install latest version of Dynamips automatically
** To enable multiple Dynamips open.
– go to http://www.internetworkexpert.com/resources/iosonpc.htm and click "Click here to download the Internetwork Expert Topologies for Dynagen" to down load CCIE lab configs and hecked "dynamips-start" file. Overwrite it to dynamips-start file that was came with origin s/w, Dynamips.
3. Download IOS from Cisco website. (valid user)
– Once download a correct image, just extract the image and rename it to
ex)c3640-jk9o3s-mz.123-14.T7.bin — > c3640-jk9o3s-mz.123-14.T7.extracted.bin
It will cut down IOS loading time.
4. Open and configure Dynagen file(.net)
– Open a file at C:\p\Cisco\dynamips\internetwork.expert.topologies\Program Files\Dynamips\sample_labs\internetworkexpertie.routing.and.switching.topology.4.01
– Changed IOS image file and check correct path.
– Auto start all device on the list
autostart=false —> autostart=true
– configure file
[[Router R1]] —> Router name
model = 3640 —> Router model
console = 2001
autostart = false —> Auto start option disabled
slot0 = NM-1FE-TX —> usable module
slot1 = NM-4T —> usable module
F0/0 = SW1 F1/1 —> F0/0 connected to SW1 F1/1
S1/0 = FRSW 1 —> S1/0 connected to FRSW 1
cnfg = C:\Program Files\Dynamips\sample_labs\internetworkexpert\initial.configs\R1.initial.config.txt —> saved your cisco config file
[[router R2]]
# No need to specify an adapter here, it is taken care of
# by the interface specification under Router R1
5. Execute
– Click Dynamips server (Icon at screen). Two DOS windows popped up and awaiting stage.
Cisco 7200 Simulation Platform
Copyright (c) 2005,2006 Christophe Fillot.
Build date: Nov 17 2006 13:20:41
Hypervisor TCP control server started
– Click Dynagen file (you just modified), then a DOS windows popped up.
Reading configuration file…
Network successfully loaded
Dynagen management console for Dynamips
Copyright (c) 2005-2007 Greg Anuzelli
=> list
Name Type State Server Console
TermServ 3640 stopped localhost:7201 2000
R1 3640 stopped localhost:7200 2001
R2 3640 stopped localhost:7200 2002
R3 3640 stopped localhost:7200 2003
R4 3640 stopped localhost:7200 2004
R5 3640 stopped localhost:7200 2005
R6 3640 stopped localhost:7200 2006
SW1 3640 stopped localhost:7200 2007
SW2 3640 stopped localhost:7201 2008
SW3 3640 stopped localhost:7201 2009
SW4 3640 stopped localhost:7201 2010
BB1 3640 stopped localhost:7201 2011
BB2 3640 stopped localhost:7201 2012
BB3 3640 stopped localhost:7201 2013
FRSW FRSW always on localhost:7201 n/a
=>
6. Operation
– Type : => list , this commands will bring all the list device was configured at Dynagen file.
– Type : => start R1 (case sensitive)
– Type : => list, you will see R1 is starting stage.
– Type router name whatever you want to use it.
– Type : => telnet R1, separated telnet window will be popped up.
or
– Type : => start all
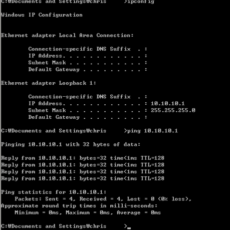
** If you want to user Terminal server way to access all the Devices. You need to make loopback interface on your window machine. see http://support.microsoft.com/kb/839013
Once you have created loopback interface and replace loopback ID = NPF_{4065B11C-2A6C-4FD2-8204-A12A9A8328A4} at your Dynagen file.


 The www.ipBalance.com runs by a volunteer group with IT professionals and experts at least over 25 years of experience developing and troubleshooting IT in general. ipBalance.com is a free online resource that offers IT tutorials, tools, product reviews, and other resources to help you and your need.

![[Splunk] – Basic search fields and commands logo_splunk.png](https://ipbalance.com/wp-content/uploads/2009/06/logo_splunk-100x80.png)
